
Jvaloh walkthrough
This page walks you through the whole Jvaloh story in order, with every gym, rival battle, required item and puzzle route. Jvaloh is PBO’s own region, made for the game: you arrive by sea from Sinnoh, pick an Alola starter from Professor Blaze, and chase a clan of priests who are capturing the legendary dogs.

If you are lost, open the Quest Tracker in the icon bar at the top right of the screen. The current story quest always names the next place to go, and this walkthrough follows the same order.
Before you go
Section titled “Before you go”You can start once the Sinnoh story is done up to Stark Mountain. After you return the Magma Stone to Buck,  Professor Rowan waits for you in Sandgem Town with the quest that leads to Jvaloh.
You do not need to battle Heatran first. Not there yet? See the Sinnoh walkthrough.
Your first gym
Section titled “Your first gym”You arrive with no Jvaloh badges, so your Sinnoh Pokémon fight at level 5, and Gym Leader Ghadafi’s Pokémon are levels 15–17. Build a new team here:
- The starter you get from Professor Blaze begins at level 1.
- The wild Pokémon between New Dawn Town and Patthar Village are levels 2–10.
- Train your starter and a few Pokémon you catch in Jvaloh to about level 17 before you challenge him.
Each badge only raises the cap by 5, so Pokémon caught in Jvaloh do most of the work until you are Jvaloh Champion. See getting ready for Jvaloh’s gyms.
Region Changer
Section titled “Region Changer”You can make a few Pokémon “Jvaloh-native”.  Region Changer Chavez in Professor Blaze’s lab reception changes where a party Pokémon counts as caught, so the cap no longer applies to it. He converts up to 7 Pokémon in total (his dialogue still says 5).
He only takes Pokémon at or below level 5, plus 10 per Jvaloh badge (level 5 with no badges, 15 with 1, and so on). If you plan to use him, bring low-level Pokémon or come back after a few badges.
Field skills
Section titled “Field skills”Field skills in Jvaloh need these Jvaloh badges. See why you never teach HMs in the FAQ.
| Field skill | Jvaloh badges needed |
|---|---|
| Rock Smash | 1 |
| Cut | 2 |
| Strength | 6 |
| Rock Climb | 7 |
| Waterfall | 8 |
| Surf | None: surfing has no badge requirement in Jvaloh |
Teleporters
Section titled “Teleporters”Most towns have a  Skynet Travel teleporter, including Matti Village, which has no Pokémon Center. A trip costs 50 F. A town becomes a destination once you have visited it or have enough badges for it, and every stop is open once you are Jvaloh Champion.
Jvaloh’s teleporters don’t leave Jvaloh, but once you have a Jvaloh badge, the  Tournament Assistant in every Jvaloh Pokémon Center sends you for free to the Champion’s Hall Tournament Room, whose teleporter serves every region. See Travelling between regions.
Route 219 to New Dawn Town
Section titled “Route 219 to New Dawn Town”


Where to go: Sandgem Town and Route 219 in Sinnoh, then by sea through Route 219 (South) to Route 219 (South-West) and New Dawn Town.
-
Sandgem Town. Talk to
Professor Rowan in front of his lab. He wants you to check what the locals saw on the beach south of town. -
Route 219. At the south end of the beach you find a frightened
 Suicune. Talk to it, then go back to Sandgem.
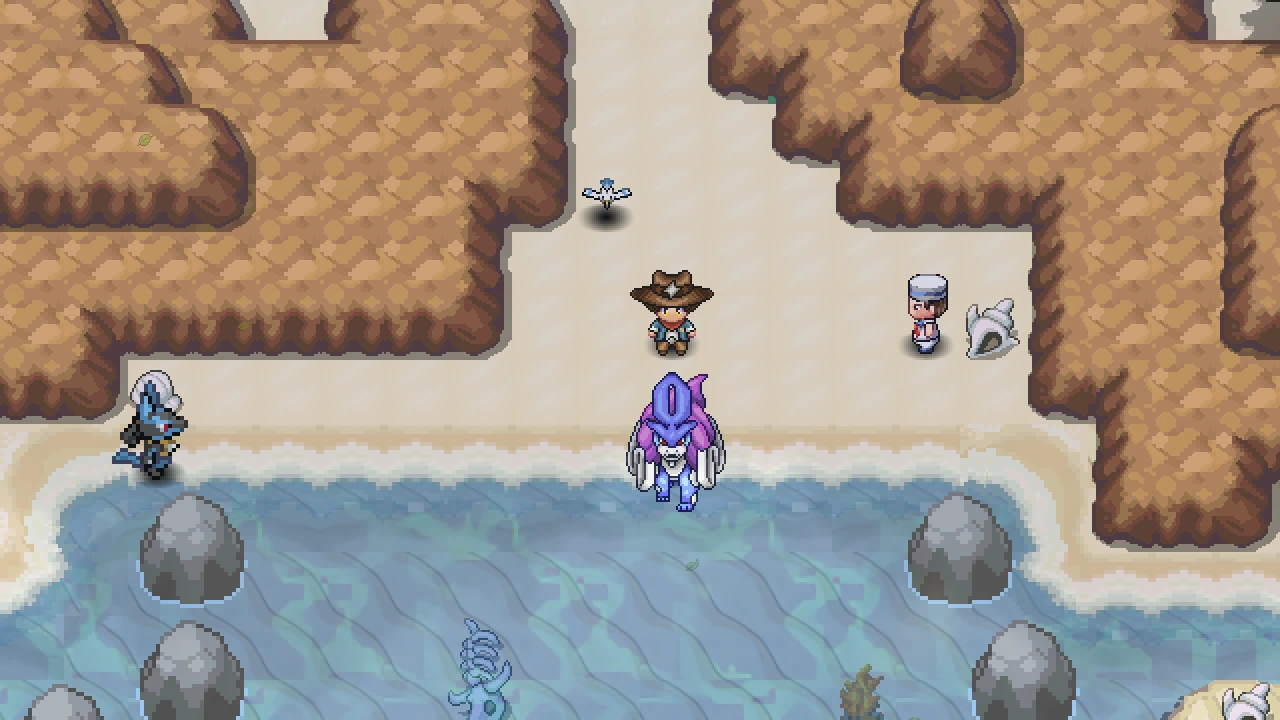
Talk to Suicune on Route 219, then go back to Sandgem Town. -
Talk to your mom.
 Your mom now waits outside the lab. She tells you Suicune came from Jvaloh, gives you the
 Family Amulet as a good-luck charm and asks you to follow it. Keep the amulet in mind; it matters much later.
-
Sail south. Return to Route 219 and surf south into Route 219 (South), then east until you reach land on Route 219 (South-West), which already counts as Jvaloh. You see Suicune again, and a little further on you meet
 Nushkie, Professor Blaze’s niece and your rival for the whole region.
-
New Dawn Town. Walk into town and enter Professor Blaze’s Lab.
 Blaze explains that an evil clan is terrorising Jvaloh, then sends you into his room to pick a companion.
-
Choose your starter. Use the incubator in Professor Blaze’s room to pick
 Rowlet,
 Litten or
 Popplio. The choice is permanent. Nushkie always starts with Rowlet.
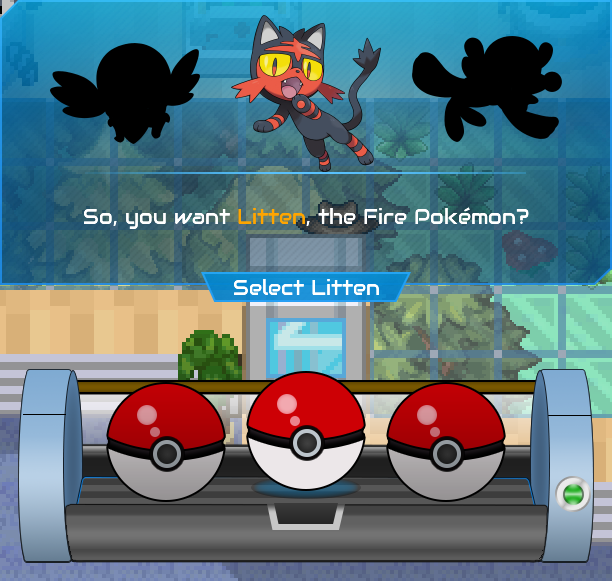
Professor Blaze offers the three Alola starters.
Before you leave New Dawn Town:
- Talk to Professor Blaze Helper in the lab reception for 10
 Storage Boxes to expand your PC.
- Talk to Region Changer Chavez in the same room if you want to convert low-level Sinnoh Pokémon (see Region Changer).
- Visit Aunt Mai in your house. She gives you the
 Jvaloh Map. Rest in the bed upstairs: it sets your respawn point, so a loss sends you here instead of back to Sinnoh.


Next: leave town for Route Sereny, where Nushkie is waiting.
Route Sereny and Patthar Village (Gym 1)
Section titled “Route Sereny and Patthar Village (Gym 1)”


Where to go: Route Sereny, Route 1, Rockshore City and its eastern checkpoint, Route 2, Boulder Cavern 1F and Patthar Village.
-
Route Sereny.
Nushkie stops you and challenges you to a race to the end of Route 1. -
Route 1. She waits at the far end of the route for your first rival battle.
Nushkie (Route 1)- RowletLv. 5
 PidgeyLv. 5
-
Patthar Village. Continue through Rockshore City and its eastern checkpoint to Route 2, then through Boulder Cavern 1F. The exit on the far side leads to Patthar Village.
Nushkie is already there and already has her badge. -
Gym 1. Challenge Ghadafi; see Gym 1 below.
Gym 1: Ghadafi (Rock)
Section titled “Gym 1: Ghadafi (Rock)”
Level: Ghadafi’s strongest Pokémon is level 17, so aim for about that level with Pokémon caught in Jvaloh. Your Sinnoh Pokémon fight at level 5 at most here.
Bring: Water, Grass and Ground moves.  Dwebble is part Bug, so Grass and Ground moves only do normal damage to it, but Water moves still hit it hard. The gym guide warns that his Pokémon get tougher in a sandstorm.
 Gym Leader Ghadafi
 RoggenrolaLv. 15
 RockruffLv. 16
- DwebbleLv. 17
Rewards: 300 F, TM48 (Rock Tomb) and a few  Blaze Coins.
Worth catching:
| Where | Pokémon |
|---|---|
| Rockshore City |  Bonsly |
| Route 2 |  Crabrawler |
| Boulder Cavern 1F |  Diglett, Dwebble |
| Oozy Forest, a branch off Route 1 |  Combee,  Qwilfish (fishing) |
Next: with your first badge, the lower path of Boulder Cavern 1F opens the way to Bijli City.
Bijli City (Gym 2) and the New Power Plant
Section titled “Bijli City (Gym 2) and the New Power Plant”


Where to go: back into Boulder Cavern 1F, then Boulder Cavern 2F, Route 3 Cliffs, Route 3 and Bijli City. Afterwards, Route 3 - Cliffside and the Power Plant.
-
Back into Boulder Cavern. With your first badge, the lower path of Boulder Cavern 1F opens. Two of the clan’s priests,
 Sharon and
 Danny, are blocking it. Beat both to pass.Sharon (Boulder Cavern 1F)
 CroagunkLv. 15
 SandileLv. 15
Danny (Boulder Cavern 1F) DarumakaLv. 15
 ZubatLv. 16
-
Route 3. Climb Boulder Cavern 2F to Route 3 Cliffs and head north along Route 3.
Nushkie congratulates you at the end of the route, then you pass the guard room into Bijli City. -
Gym 2: Elleak. Beat her for your second badge; see Gym 2 below.
-
Follow Nushkie. Outside the gym,
Nushkie asks you to check out the new Power Plant south of Route 3 Cliffs. Go back to Route 3 Cliffs and take the south path down Route 3 - Cliffside to the Power Plant. -
Power Plant.
Nushkie overheard someone talking about capturing a legendary electric dog and runs into the Generator Room. Follow her, beat the grunt who has cornered her, and listen to her apology. She heads off towards Gym 3.Grunt (Power Plant Generator Room) DedenneLv. 23
 SnubbullLv. 23
- SnubbullLv. 23
Gym 2: Elleak (Electric)
Section titled “Gym 2: Elleak (Electric)”
Level: Elleak’s strongest Pokémon is level 25, so aim for about that level. Your Sinnoh Pokémon fight at level 10 at most here.
Bring: Ground types. They are immune to Electric moves, and Ground moves hit most of her team super-effectively.  Joltik is part Bug, so Ground moves only do normal damage to it; use Fire or Rock moves.
 Gym Leader Elleak
- JoltikLv. 23
 ChinchouLv. 25
 HelioliskLv. 24
 ElectabuzzLv. 25
Rewards: 500 F, TR80 (Electro Ball) and a few Blaze Coins.
Worth catching:
| Where | Pokémon |
|---|---|
| Route 3 Cliffs |  Pikipek,  Oricorio (Pom-Pom) |
| Bijli City |  Emolga |
| Route 3 |  Frillish (fishing) |
Next: head east from Bijli City along Route 4, towards Lehar Town and Gym 3.
Lehar Town (Gym 3)
Section titled “Lehar Town (Gym 3)”


Where to go: east from Bijli City along Route 4 and Route 4 Shores to Lehar Town.
-
Route 4. Head east from Bijli City. Halfway along, a masked man,
 Commander Horus, recognises you from your fights with his master’s disciples and walks off.
-
Route 4 Shores. A grunt is threatening
 Expert Dario. Beat Grunt Bjorn to free him (Dario’s wife,
 Expert Manola, gives you 5
 Great Balls at their house in Lehar Town). Then
 Izumi, the Lehar gym leader, asks for your help: there was an explosion in her town.
-
Clear Lehar Town. Five grunts are spread around the flooded town:
Roy, Tikku, Teena, Jaya and Jai. Nushkie guards the gym door meanwhile.- Beat all five, then talk to Commander Horus near the east side. He boasts that the clan has already captured Suicune and leaves.
- Nushkie, who already has her third badge, tells you Izumi is waiting.
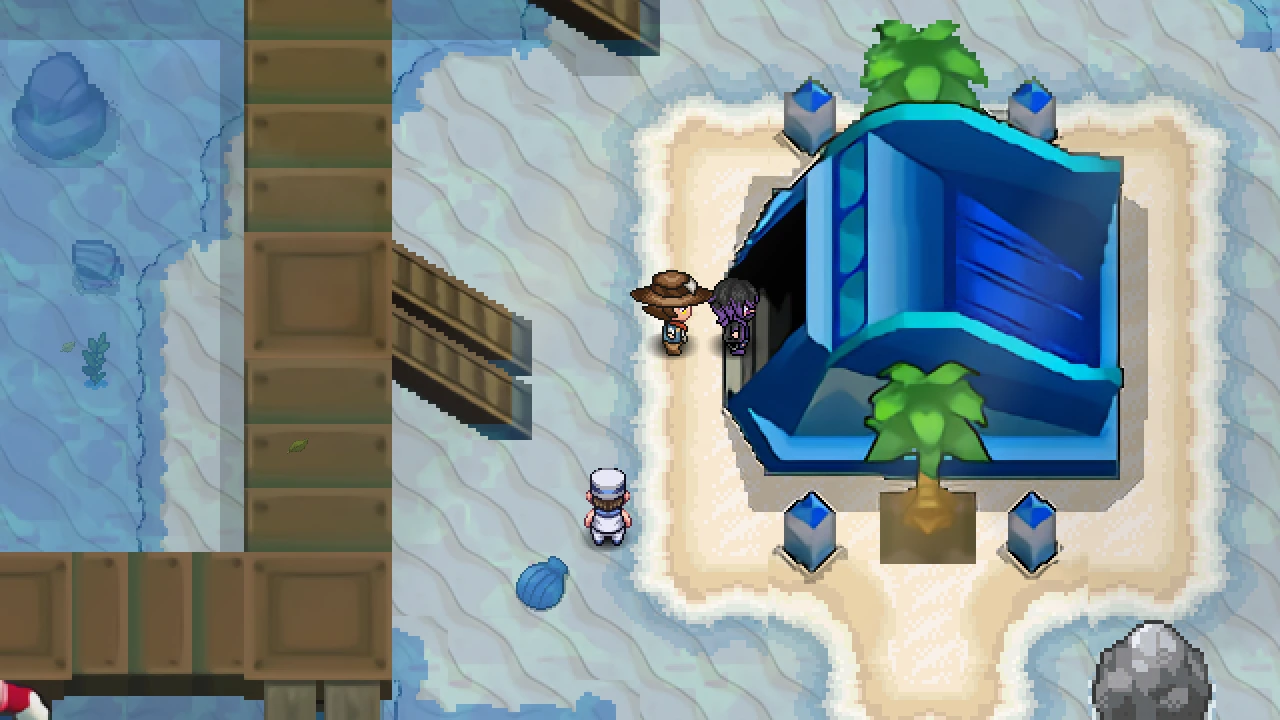
Commander Horus waits on the east side of Lehar Town once the five grunts are beaten. - Beat all five, then talk to
-
Gym 3: Izumi. Beat her for your third badge; see Gym 3 below.
-
Nushkie again. At the north exit of town she wants a rematch now that you have 3 badges.
Nushkie (Lehar Town) PidgeottoLv. 30 · Leftovers
 SeadraLv. 30 · Leftovers
 DartrixLv. 32 · Leftovers
Gym 3: Izumi (Water)
Section titled “Gym 3: Izumi (Water)”
Level: Izumi’s strongest Pokémon is level 33, so aim for about that level. Your Sinnoh Pokémon fight at level 15 at most here.
Bring: Electric and Grass moves. Izumi’s Water types are weak to both, with two exceptions:
 Whiscash is part Ground, so Electric moves cannot touch it, but Grass moves hit it four times as hard.
 Tentacruel is part Poison, so Grass moves only do normal damage to it; use Electric.
Gym Leader Izumi
- TentacruelLv. 33 · Black Sludge
 FrogadierLv. 33 · Expert Belt
- WhiscashLv. 32 · Expert Belt
 CloysterLv. 32 · Never-Melt Ice
 DewgongLv. 33 · Chesto Berry
Rewards: 750 F, TM33 (Rain Dance) and a few Blaze Coins.
Worth catching:
| Where | Pokémon |
|---|---|
| Route 4 |  Happiny (Ultra Rare),  Scraggy |
| Route 4 Shores |  Bruxish,  Shellder (fishing) |
| Lehar Town Shores |  Tropius,  Sandygast |
Next: leave Lehar Town to the north through Lehar Town Shores, for Route 5 and Milen Bridge.
Milen Bridge, Glassmoor City and Grayroot Town (Gym 4)
Section titled “Milen Bridge, Glassmoor City and Grayroot Town (Gym 4)”


Where to go: Lehar Town Shores, Route 5 and Milen Bridge, then west into Glassmoor City and south to Grayroot Town.
-
Route 5. Leave Lehar Town to the north through Lehar Town Shores. Go north through Route 5-A and 5-B, west into Route 5-C, north to Route 5-Lakefront and then west through the checkpoint onto Milen Bridge. An
 Ursaring daily boss stands on Route 5-C (optional).
-
Milen Bridge. Grunts stand in front of the houses, and
Horus waits at the west end, telling you it is “too late”. In the western checkpoint you meet  Aurelia, principal of Grayroot Primary School: children have stopped turning up at school.
-
Zorg Cafe. Talk to the residents of Milen Bridge. In the cafe,
 Gentleman Saki saw priests in orange entering Nova Center (also called Nova Condominios) in Glassmoor City.
-
Nova Center. Go west into Glassmoor City and enter Nova Center. The
 guard now lets you in.
On 1F
 an old lady begs you to save the children. Three apartments are under attack. Beat:
- Grunt Tina in Alexandre’s House
- Grunt Tikku in Sai’s House
- Grunt Sipi in Ruben’s House
-
Tikku’s supervisor. Tikku runs off to meet his supervisor in Glassmoor City. Find them in the north of the city:
Horus scolds Tikku, lets the kidnapped children go and leaves. Aurelia tells you Horus is after the Old Power Plant, then asks you to visit her school. -
Gym 4: Aurelia, Grayroot Pokémon School. Leave Glassmoor to the south and follow Grayroot Town’s Northern Pass down to Grayroot Town. See Gym 4 below.


Gym 4: Aurelia (Normal)
Section titled “Gym 4: Aurelia (Normal)”
Level: Aurelia’s strongest Pokémon is level 43, so aim for about that level. Your Sinnoh Pokémon fight at level 20 at most here.
Bring: Fighting moves: they hit four of Aurelia’s six Pokémon super-effectively.  Staraptor is part Flying and
 Oranguru part Psychic, so Fighting moves only do normal damage to them: use Electric, Ice or Rock moves on Staraptor, and Dark or Bug moves on Oranguru. Ghost moves do nothing to her team.
How it works: the gym is the school, with students to battle on the way to Aurelia.
Grayroot Pokémon School: the door route
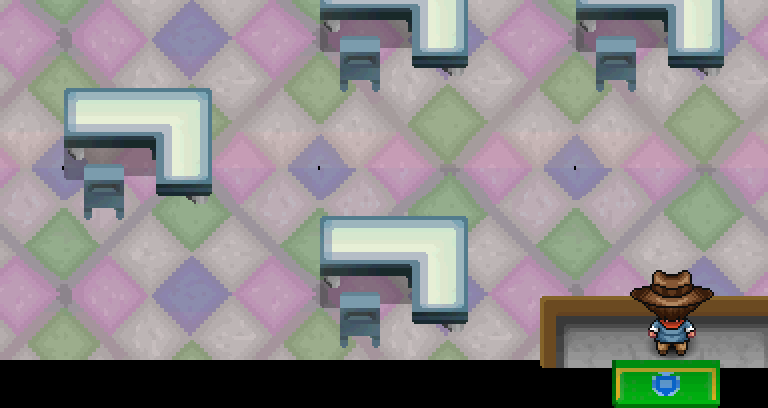
The school is a set of classrooms joined by doors in the corners. Two students in the second classroom argue about which door is right; this is the shortest way, checked against the school’s map files.
- Entrance hall. Take the left door at the top. The right door leads to a dead-end classroom with School Kid Bernhard.
- Next classroom. Take the top-right door.
- Next classroom. Take the top-left door.
- Next classroom. Take the top-left door again. You are now in a bigger classroom with five doors.
- Big classroom. Take the bottom-right door.
- Last classroom. Take the top-right door into Aurelia’s room.
Other doors lead to small dead-end rooms or loop back. After you are Jvaloh Champion, a Gym Teleporter at the entrance warps you straight to Aurelia.
Gym Leader Aurelia
 SmeargleLv. 40 · Permanent Focus Sash
- StaraptorLv. 42 · Sharp Beak
- OranguruLv. 42 · Leftovers
 ExploudLv. 41 · Expert Belt
 SnorlaxLv. 43 · Chesto Berry
 LinooneLv. 40 · Sitrus Berry
Rewards: 1,500 F, TR01 (Body Slam) and a few Blaze Coins.
Worth catching:
| Where | Pokémon |
|---|---|
| Grayroot Town - Northern Pass |  Munchlax (Ultra Rare),  Mudbray |
| Route 5-Lakefront |  Karrablast,  Shelmet |
| Route 5-A |  Natu |
Next: Nushkie meets you outside Grayroot’s gym and shows you the way to the Old Power Plant.
The Old Power Plant
Section titled “The Old Power Plant”


Where to go: Patthar Village, the hidden part of Boulder Cavern (1F down to B3F), the Underground Cavern and the Old Power Plant.
-
Patthar Village.
Nushkie meets you outside Grayroot’s gym and says she will show you the way. Teleport to Patthar Village.She waits at the top of the village, beside some wooden planks. Walk onto them and you fall into a hidden part of Boulder Cavern.
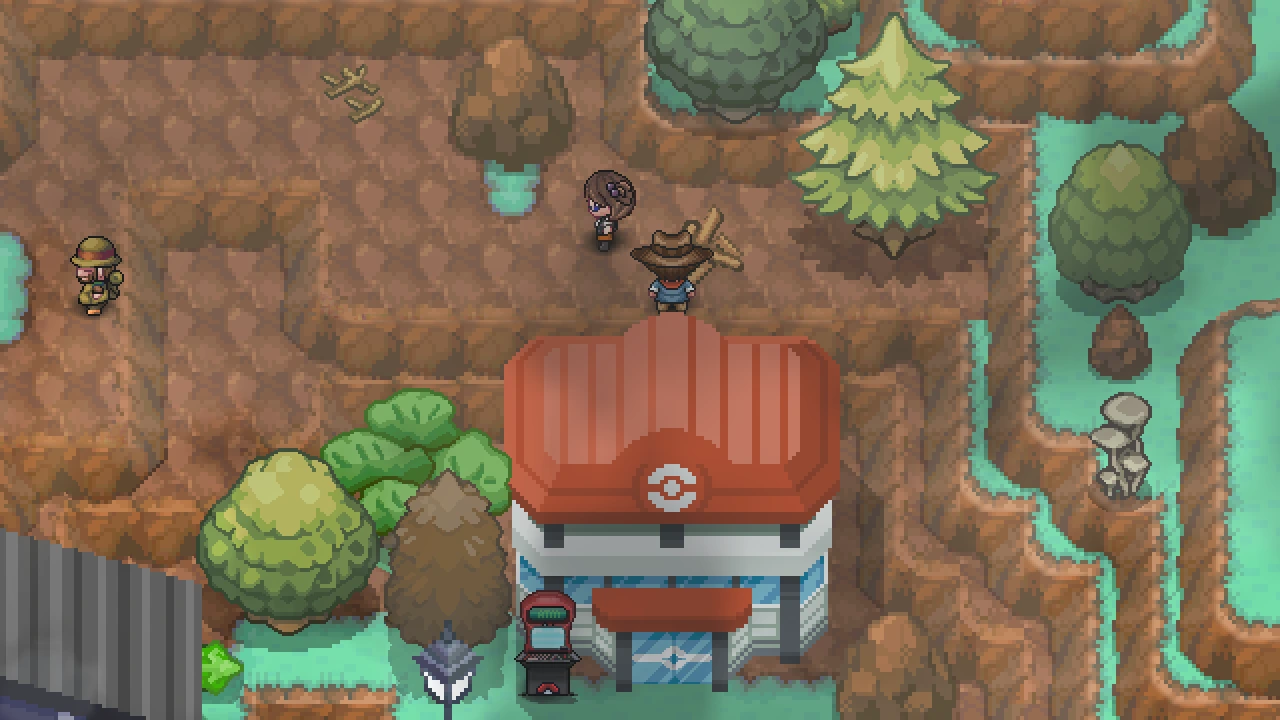
The planks in Patthar Village hide the way to the Old Power Plant. -
Through Boulder Cavern. Go down through Boulder Cavern - 1F, B1F, B2F and B3F. On B1F a strange tablet heals your team for free. Leave B3F by its west edge into the Underground Cavern.
-
Underground Cavern. Beat the grunts, then go into the Old Power Plant building in the middle of the cavern.
-
Old Power Plant. Room 1 has a working healing pod. From Room 1, take the south-east door to the stairs and go down to the Restricted Area, beating Horus’s grunts on every floor.
-
Find Horus.
Horus has already captured Suicune and  Raikou and walks away. Nushkie arrives, feeling like a failure, and runs ahead to Glassmoor City and Route 6.
Worth catching:
| Where | Pokémon |
|---|---|
| Underground Cavern |  Klefki (Ultra Rare),  Galarian Corsola |
| Old Power Plant - Room 2 | Joltik |
Next: Glassmoor City’s west exit leads to Route 6 and the Scorched Desert.
Across the Scorched Desert to Lansoil City (Gym 5)
Section titled “Across the Scorched Desert to Lansoil City (Gym 5)”


Where to go: Glassmoor City’s west exit, Route 6, Regis Town, Route 6 Highway Pass, the Scorched Desert and Lansoil City.
-
Route 6. Leave Glassmoor City by the west exit.
Nushkie explains that nobody crosses the desert without  Go Goggles.
-
Buy 5 Casteliacones.
 Chef Baille in the Jvaloh Fast Food Van on Route 6 sells
 Casteliacones for 200 F each.
-
Regis Town. Go west. In Regis Villa 2, upstairs,
 Ruin Maniac Manas trades a pair of Go Goggles for your 5 Casteliacones. In town, Ruin Maniac Angus trades an
 Odd Keystone for one
 Devon Scope (keep it for the post-game).
-
Scorched Desert. Continue west through Route 6 Highway Pass, where six Backpackers wait, and into the desert.
 Hiker Mirai lets you in now that you have Go Goggles. Cross it to Lansoil City.
-
Gym 5: Arturo, Lansoil City. The gym is a sand puzzle with hidden pits; see Gym 5 below.
-
Nushkie in the Lansoil Pokémon Center. She battles you as soon as you have the fifth badge. Afterwards she tells you to take the ship to the volcano.
Nushkie (Lansoil Pokémon Center) NidokingLv. 50
 StarmieLv. 50
 PidgeotLv. 51 · Leftovers
 KingdraLv. 51 · Leftovers
 DecidueyeLv. 52 · Leftovers


Gym 5: Arturo (Ground)
Section titled “Gym 5: Arturo (Ground)”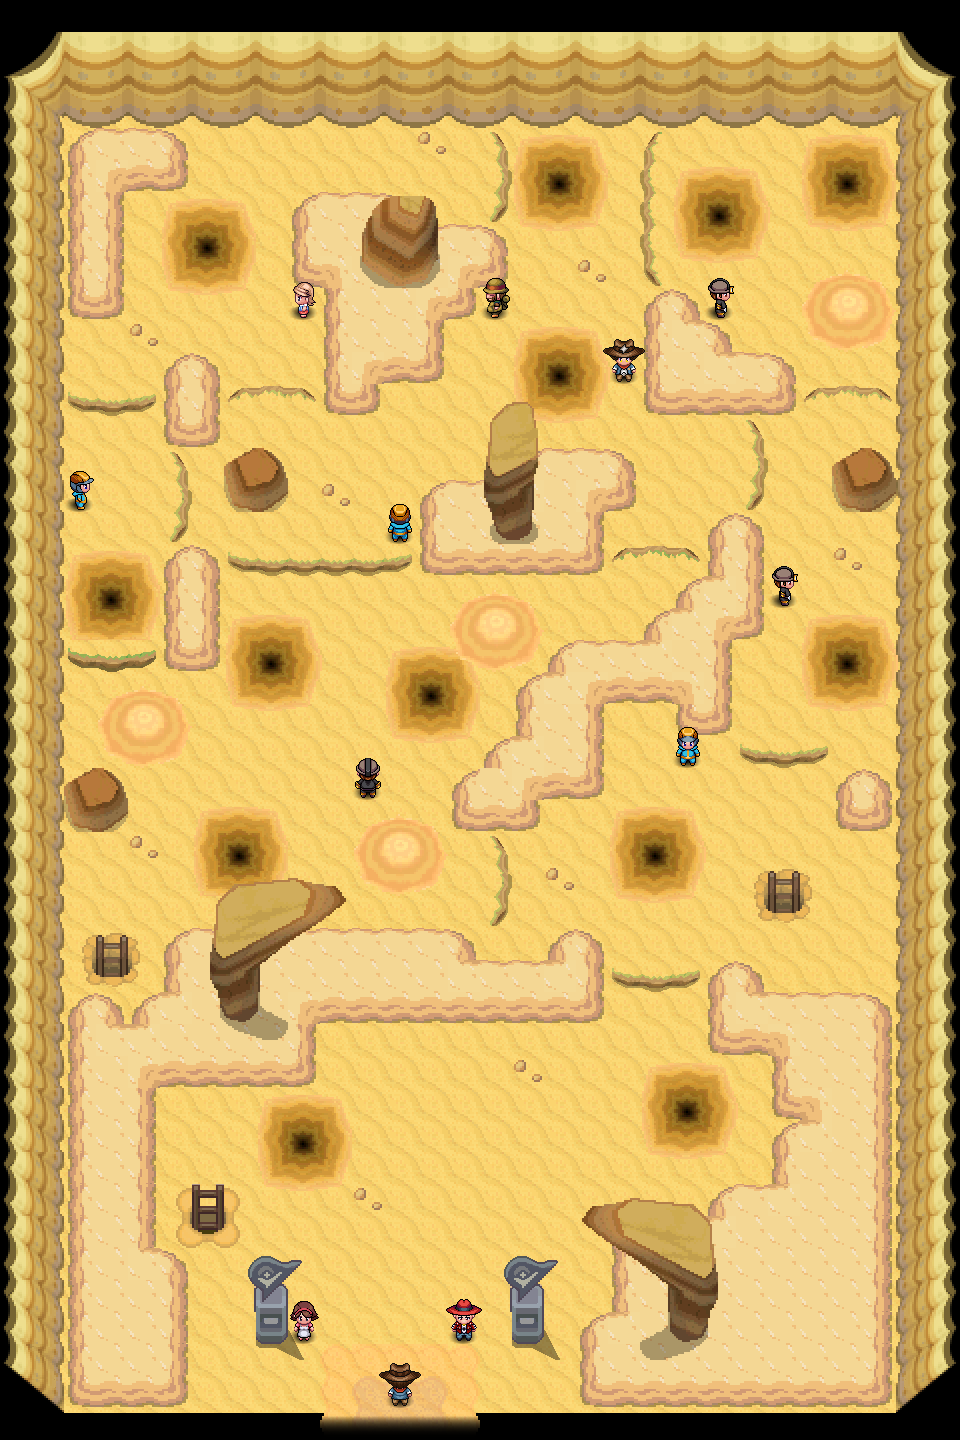
Level: Arturo’s strongest Pokémon is level 50, so aim for about that level. Your Sinnoh Pokémon fight at level 25 at most here.
Bring: Water, Grass and Ice moves. A sandstorm always blows in Arturo’s room.
Lansoil Gym: the route through the sand pits
The gym has an upper floor and a basement. Some sand tiles are hidden pits: some drop you into a part of the basement, others into a small pit room whose exit puts you back near the entrance.
This is the shortest safe route, worked out from the gym’s map files. Count steps from where each line starts.
- Upper floor. From the entrance door, walk 10 steps north, then 9 steps east. The last step drops you to the basement.
- Basement. Walk 1 north, 3 west, 1 north, 2 west, 3 north, 8 west, 2 south and 5 west to the stairs in the south-west corner, and climb back up.
- Upper floor, west side. You arrive at the bottom of the west side.
- Walk north until a three-tile ledge stops you, go round its east end and then east along the long corridor through the middle of the floor.
- Hop up the small ledge at the end into the top half, go west along the top half, and come back south down the west side.
- On the way down you hop a first ledge; keep going until you are two tiles above the second three-tile ledge, on its east end, then take one step west.
- That tile is a pit that drops you into the right part of the basement. Stay on this route; the other hidden pits drop you somewhere else.
- Basement. Walk 4 north, 1 west, 10 north, 10 east, 1 south, 3 east, 2 south, 4 east, 1 south, 2 east, 1 south, 3 east, 5 south and 2 east. The last step is a hidden pit that drops you into Arturo’s room.
If you land in the pit room, take its exit and start again from the entrance. After you are Jvaloh Champion, a Gym Teleporter in the entrance hall warps you to Arturo.
 Gym Leader Arturo
 GolurkLv. 46 · Leftovers
 DiggersbyLv. 46 · Silk Scarf
 NidoqueenLv. 47 · Black Sludge
 SeismitoadLv. 48 · Leftovers
 ExcadrillLv. 48 · Life Orb
 GarchompLv. 50
Rewards: 2,500 F, TM81 (Bulldoze) and a few Blaze Coins.
Worth catching:
| Where | Pokémon |
|---|---|
| Route 6 |  Minior |
| Scorched Desert |  Drilbur (Ultra Rare), Roggenrola |
A  Mandibuzz daily boss waits in the desert.
Next: go south from Lansoil City to Lansoil Docks for the ship to the volcano.
Amberwick Town and Mt. Inferno (Gym 6)
Section titled “Amberwick Town and Mt. Inferno (Gym 6)”


Where to go: Lansoil Docks, the S.S. Seafarer to Sunshire Town, Cresemun Beach, Amberwick Pass, Amberwick Town and Mt. Inferno.
-
Seafarer Pass. Go south from Lansoil City to Lansoil Docks. Buy 2
 Lemonades from one of the shops on the docks (350 F each) and give them to
 Sailor Sonny in the Ticket Station for a
 Seafarer Pass.
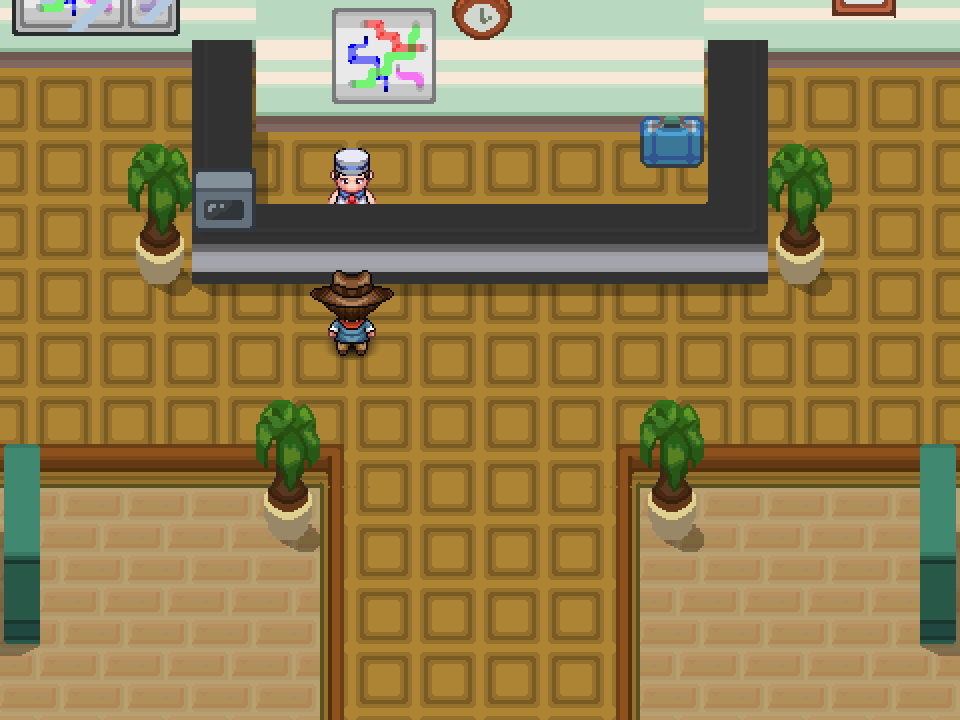
Ticket StationSailor Sonny swaps 2 Lemonades for the Seafarer Pass. -
The S.S. Seafarer. Show the pass to
Sailor Moone and sail to Sunshire Town. Follow Cresemun Beach and Amberwick Pass to Amberwick Town. -
Find Blitz. The
 monks say Gym Leader Blitz has not come back from the volcano for days. Leave by the east exit to Mt. Inferno Pass, where Nushkie says the priests have taken over the whole volcano.
-
Mt. Inferno #1 and #2. Beat the grunts. On #2, the south exit to #4 stays blocked until you have beaten all 6 grunts on that floor. Take it to #4, beat three more grunts and continue to Mt. Inferno #6.
-
Entei.
Horus captures  Entei in front of
 Blitz and Nushkie. His Charizard knocks your bag over, and Horus stares at the amulet that falls out before he leaves. Talk to Nushkie and to Blitz, who heads for the peak.
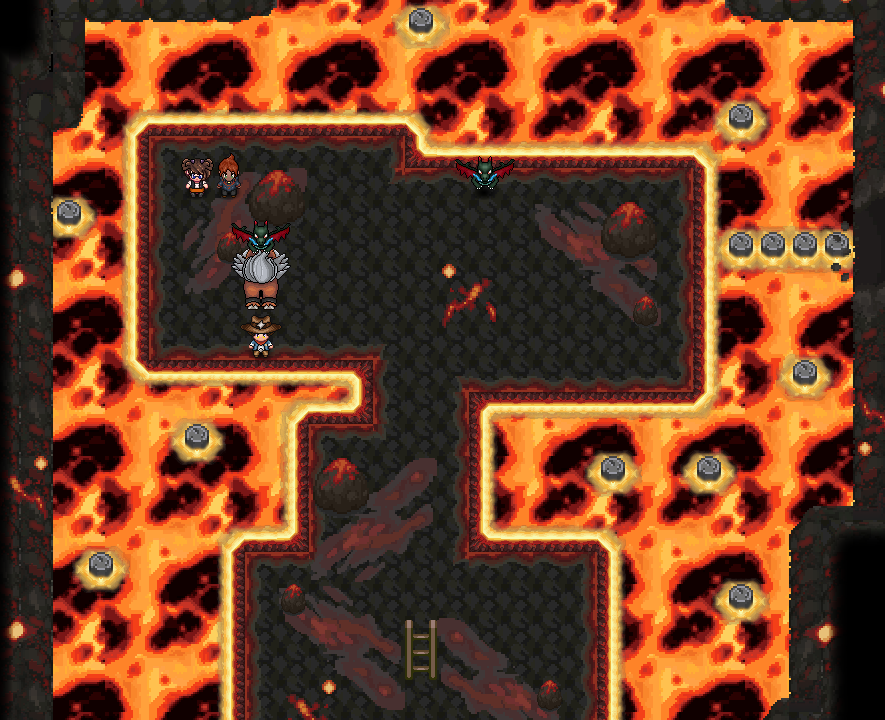
Mt. Inferno #6Where Horus takes Entei.Wild Pokémon here -
Gym 6: Blitz, Mt. Inferno Peak. Go back to #2, take the other exit to #3 and climb to the Peak. See Gym 6 below.


Gym 6: Blitz (Fire)
Section titled “Gym 6: Blitz (Fire)”
Level: Blitz’s strongest Pokémon is level 62, so aim for about that level. Your Sinnoh Pokémon fight at level 30 at most here.
Bring: Ground and Rock moves. The sun always shines on the peak, which weakens Water moves, so these are your safest picks.
Gym Leader Blitz
 DarmanitanLv. 58 · Charcoal
 NinetalesLv. 59 · Life Orb
 TurtonatorLv. 59 · White Herb
 InfernapeLv. 60 · One Time Air Balloon
 ArcanineLv. 60 · Leftovers
 BlazikenLv. 62
Rewards: 4,000 F, TM34 (Sunny Day) and a few Blaze Coins.
Worth catching:
| Where | Pokémon |
|---|---|
| Mt. Inferno Peak |  Jangmo-o (Ultra Rare),  Salazzle |
| Lower floors (Mt. Inferno #1) |  Litwick (Ultra Rare), Turtonator |
| Cresemun Beach |  Solosis,  Alomomola (fishing), both Ultra Rare |
Next: teleport back to Glassmoor City and use its north exit.
North to Barfi Town (Gym 7)
Section titled “North to Barfi Town (Gym 7)”


Where to go: Glassmoor City’s north exit, the Northern Checkpoint, Glassmoor Northern Pass, Route 7, the Drenched Forest, Sprinkle Town, Route 8, the Glacier Caves and Barfi Town.
-
Nushkie at Glassmoor. Teleport back to Glassmoor City and use the north exit.
Nushkie battles you in the Northern Checkpoint.Nushkie (Glassmoor Northern Checkpoint)- NidokingLv. 57
- StarmieLv. 57
 ShelgonLv. 58 · Life Orb
- PidgeotLv. 58 · Leftovers
- KingdraLv. 59 · Leftovers
- DecidueyeLv. 60
-
Route 7 and the Drenched Forest. Go north through Glassmoor Northern Pass, Route 7-A and 7-B into the Drenched Forest (you see a
 Seviper and a
 Zangoose fighting), then Route 7-C. At the west end of 7-C, beat Grunt Champa and talk to Nushkie.Grunt Champa (Route 7-C)
 CrawdauntLv. 60
 GengarLv. 60
 ScraftyLv. 60
 HoundoomLv. 60
 MagmortarLv. 50
-
Sprinkle Town and Route 8. Rest in Sprinkle Town, then go north along Route 8-A and 8-B into Glacier Cave-A, B and C, and out through Barfi Pass to Barfi Town.
-
Gym 7: General Thanda, Barfi Town. The gym is a two-floor maze of staircases; see Gym 7 below.
-
Nushkie at Barfi. With the seventh badge,
Nushkie challenges you in Barfi Town. Afterwards she tells you about punks in the Glacier Caves.Nushkie (Barfi Town)- NidokingLv. 63
- StarmieLv. 63
 TalonflameLv. 63 · Heavy-Duty Boots
- KingdraLv. 64 · Leftovers
- DecidueyeLv. 64
 SalamenceLv. 65 · Life Orb
-
Glacier Cave-D. Go back to Glacier Cave-C and enter the newly opened Glacier Cave-D. Beat the punks and
 Punk Leader Jack, who wanted to capture the
 Alolan Ninetales there.Punk Leader Jack (Glacier Cave-D)
 MalamarLv. 64 · Permanent Focus Sash
 RoseradeLv. 65 · Life Orb
 DragalgeLv. 65 · Expert Belt
 SharpedoLv. 66 · Permanent Focus Sash
 AbsolLv. 66 · Life Orb
 WeavileLv. 68 · Life Orb
Gym 7: General Thanda (Ice)
Section titled “Gym 7: General Thanda (Ice)”
Level: General Thanda’s strongest Pokémon is level 70, so aim for about that level. Your Sinnoh Pokémon fight at level 35 at most here.
Bring: Fire, Fighting, Rock and Steel moves. It always snows in Thanda’s room.
Barfi Gym: the staircase route
The gym has an upper floor (1F) and a lower floor (GF) joined by many staircases. Checked against the gym’s map files:
- 1F: from the entrance, go north and then all the way west to the staircase at the far west of the bottom row.
- GF: head north-west to the staircase that leads back up.
- 1F middle row: walk east, past the middle staircase, to the staircase at the east end of the row.
- GF: go north to the next staircase.
- 1F top row: walk west, past the middle staircase, to the one at the far west end.
- GF: walk west to the door into General Thanda’s room.
 Gym Leader General Thanda
 GlalieLv. 70 · Glalitite
- Ninetales-AlolaLv. 67 · One Time Focus Sash
- CloysterLv. 67 · Never-Melt Ice
 MamoswineLv. 68 · Life Orb
 AvaluggLv. 68 · Leftovers
- WeavileLv. 68 · Life Orb
Rewards: 6,500 F, TM35 (Hail) and a few Blaze Coins.

The Alolan Ninetales in Glacier Cave-D stays as a daily boss with its own costume drops. Either the Seviper or the Zangoose of the Drenched Forest becomes one too, once you pick a side with the Forest Flute; the choice is permanent. See Jvaloh daily bosses.
Worth catching:
| Where | Pokémon |
|---|---|
| Drenched Forest |  Shuckle (Ultra Rare),  Dewpider |
| Route 7-C |  Kangaskhan (day) |
| Glacier Cave-D |  Sneasel (Ultra Rare),  Swinub |
| Route 8-A | Oranguru |
Next: Barfi Town’s south-east exit leads to Barfi Falls and the broken cable car.
The cable car, Ochra Town and the stolen flashlight
Section titled “The cable car, Ochra Town and the stolen flashlight”


Where to go: Barfi Falls, a trip back to the Old Power Plant, the cable car to Ochra Cliffs, Ochra Park, Ochra Town, Route 9 and Matti Village.
-
Barfi Falls. Take Barfi Town’s south-east exit to Barfi Falls and talk to
 Tourist Sharma, who complains that the cable car is broken (the Cogwheel Piece only appears after this talk). In the house,
 Engineer Sahil needs a Cogwheel Piece from the generators of the Old Power Plant.
-
Fetch the Cogwheel Piece. Teleport to Patthar Village, go back through the planks and caves to the Old Power Plant - Room 2 and pick up the Cogwheel Piece. With seven badges, a shortcut in Room 2 takes you straight back to Patthar Village.
-
Ride the cable car. Give the piece to
Sahil, then talk to  Driver Poha to ride to Ochra Cliffs. In the first house, Old Man Rajeev asks for a Marrow Potion; it is a long side quest that most players finish after the story.
-
Ochra Town. Cross Ochra Park-A and B.
Nushkie has learned that Horus’s master is Osiris, once the most respected priest in Jvaloh, who went rogue after his wife died in an explosion. Talk to the locals for more clues. -
Matti Village. Go east along Route 9-A and 9-B. On Matti Cliffs,
Hiker Chetawa will not let you into the caves without a  FlashLight. The seller, Hiker Savera, is in Matti Village House 4, but his stock was stolen by a boy dressed as a ninja.


The flashlight chase
Section titled “The flashlight chase”-
Spot the ninja. On Route 9-B,
 Young Boy Tushar spots you and runs.
-
Catch him. Catch him on Route 9-A and beat him. A priest forced him to steal the stash and then took it, mentioning the desert.
Young Boy Tushar (Route 9-A) MedichamLv. 68
 PrimeapeLv. 68
 BreloomLv. 70
-
Search the desert. Teleport to Lansoil City and find
Grunt Cheema in the Scorched Desert. After the battle he says the stash is hidden on Route 6 Highway Pass.Grunt Cheema (Scorched Desert) CrobatLv. 70
 CofagrigusLv. 70
- GolurkLv. 71
 KrookodileLv. 72
-
Pick up the stash. In the eastern of the two Highway Apartments buildings on Route 6 Highway Pass, go upstairs and pick up the FlashLight Stash from the item ball.
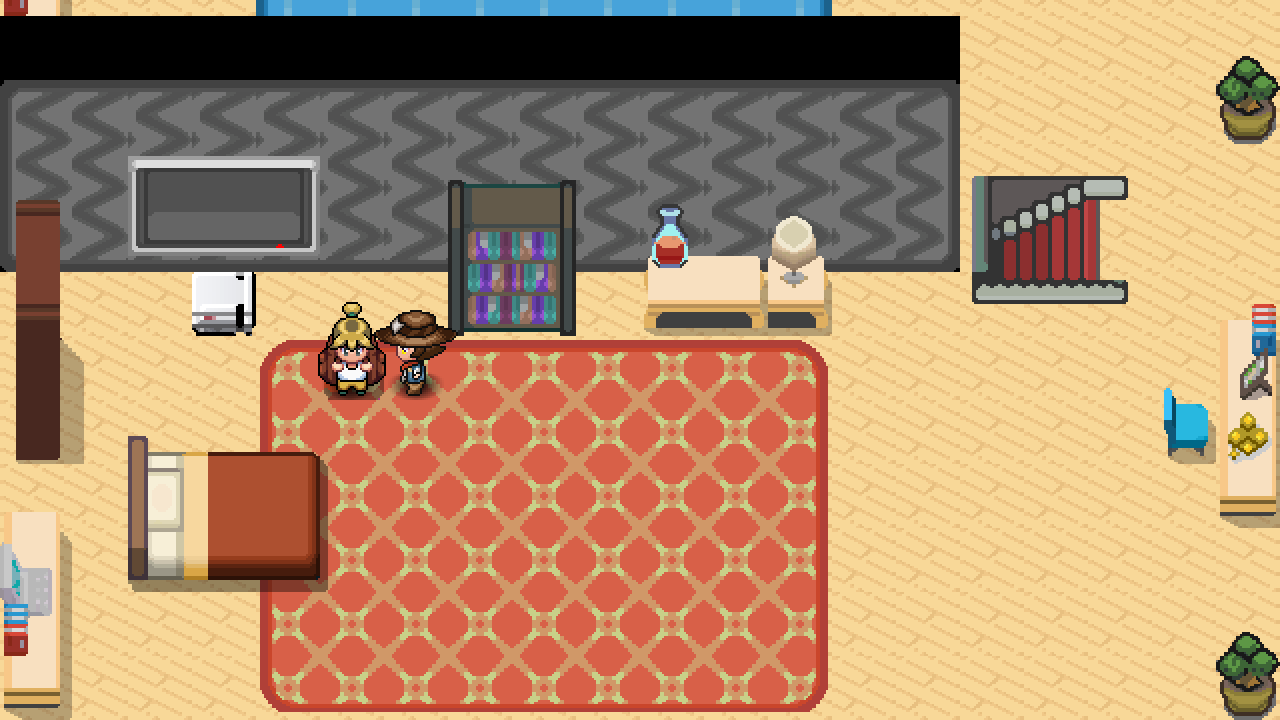
Highway ApartmentsThe FlashLight Stash is in the item ball upstairs in the eastern building. -
Return it. Take it back to
Hiker Savera in Matti Village. He grabs it and runs: he was an impostor. -
Get the FlashLight. Chase him to Route 9-B. He is
Grunt Tikku in disguise. Beat him to get the FlashLight.Grunt Tikku (Route 9-B) RhyperiorLv. 72 · Leftovers
- MandibuzzLv. 72 · Leftovers
 DrapionLv. 72 · Black Sludge
- ScraftyLv. 72 · Leftovers
- DarmanitanLv. 72 · Life Orb

Through Cavity Cavern
Section titled “Through Cavity Cavern”
Now Hiker Chetawa lets you pass. Matti Cliffs is a cliff face with eight small caves that connect its ledges. Matti Village House 5 has a free  nurse if you need to heal.
- First caves. Go into Cavity Cavern 1-A, then 2-A, and come out onto the cliff.
- Second caves. Go into 2-B, 3-A and 2-D, and come out again.
- Last caves. Go into 2-E and 1-B, and come out a last time.
- On to Goldburn. From there walk east to Route 10 and Goldburn City.
Worth catching:
| Where | Pokémon |
|---|---|
| Ochra Park-A |  Feebas (Ultra Rare, fishing) |
| Ochra Park-B |  Pyukumuku |
| Matti Village | Snorlax (Ultra Rare),  Tauros |
| Cavity Cavern 3-A |  Cleffa (Ultra Rare) |
Next: Goldburn City and the last gym.
Goldburn City (Gym 8)
Section titled “Goldburn City (Gym 8)”

Where to go: Goldburn City, then Jannat Village by way of Route 7-B and Route 12, the Goldburn City Temple and the Amberwick Monastery.
-
Goldburn City.
Nushkie has more news: Osiris’s wife once captured a Rayquaza and mistreated it, until it turned on her.  Dragon Tamer Veles stands in front of the gym: leader Charil has gone to Jannat Village because one of her Pokémon is ill.
-
Jannat Village. Teleport to Glassmoor City and go north to Route 7-B, then take its north exit to Route 12-A and 12-B.
 Charil is in Jannat Village House 4: her
 Charizard was frozen by Horus’s Poliwrath and no Pokémon Center can help.
-
Ask the head monk. In the Goldburn City Temple,
Head Monk Ching Ling can make a  Sacred Elixir, but he needs his Prayer Book.
-
Fetch the Prayer Book. Teleport to Amberwick Town. In the Amberwick Monastery, his brother
Monk Dim Sum gives you the Prayer Book. -
Sacred Elixir. Bring the book to Ching Ling for the Sacred Elixir, then take it to Charil in Jannat Village. Her Charizard recovers.
-
Gym 8: Charil, Goldburn City. The gym is a path of warp tiles; see Gym 8 below.


Gym 8: Charil (Dragon)
Section titled “Gym 8: Charil (Dragon)”
Level: Charil’s strongest Pokémon is level 80, so aim for about that level. Your Sinnoh Pokémon fight at level 40 at most here.
Bring: Ice, Dragon and Fairy moves for most of Charil’s team, with a few exceptions:
 Dragonite takes four times the damage from Ice, and
 Hydreigon and
 Kommo-o four times the damage from Fairy.
- Kingdra only takes normal damage from Ice, and Dragalge only normal damage from Fairy.
- Her strongest Pokémon, a level 80 Charizard, holds a
 Charizardite X and can Mega Evolve into
 Mega Charizard X, which is Fire and Dragon. Fairy and Ice moves are not super effective on it in either form. Use Rock moves: they hit it four times as hard before it Mega Evolves and twice as hard after.
Goldburn Gym: the warp-tile route
Checked against the gym’s map files. Each line starts where the previous warp tile drops you.
- From the entrance door, walk 10 north, 1 east, 4 north and 11 east onto the first warp tile.
- Walk 1 north, 10 east, 2 north, 1 east, 6 north, 1 east, 1 north, 4 east, 1 south, 4 east, 3 south and 2 east onto the next warp tile.
- Walk 9 north and 5 west onto the next one.
- Walk 4 north and 3 west onto the next one.
- Walk 5 east, 1 north, 2 east, 8 north, 1 east and 6 north onto the last one.
- You land a few steps east of Charil: walk 1 south and 5 west and talk to her. Do not step back onto the tile you landed on; it sends you back near the entrance.
The counts walk around the trainers, who stay where they are after you beat them.
Most of the other warp tiles send you back to the room near the entrance. After you are Champion, a Gym Teleporter in that room warps you to Charil.
Gym Leader Charil
- DragoniteLv. 77 · Leftovers
- HydreigonLv. 77 · Life Orb
- KingdraLv. 77 · Leftovers
- DragalgeLv. 78 · Black Sludge
- Kommo-oLv. 78 · Life Orb
- CharizardLv. 80 · Charizardite X
Rewards: 8,000 F, TR47 (Dragon Claw) and a few Blaze Coins.
Worth catching:
| Where | Pokémon |
|---|---|
| Jannat Village | Litten, Rowlet and Popplio (fishing) as Ultra Rares, plus  Lapras by fishing and  Bewear |
| Route 11-B, once you have 8 badges |  Kirlia (day),  Duskull (night) |
| Route 11-C, once you have 8 badges |  Ralts |
| Goldburn City Shores |  Drampa,  Druddigon,  Durant |
Next: with 8 badges, Nushkie is waiting at the south of Goldburn City.
Horus, Osiris and Ho-Oh
Section titled “Horus, Osiris and Ho-Oh”
Where to go: the south of Goldburn City, Goldburn City Shores, then Amberwick Town and its Pokémon Center.
-
Nushkie south of Goldburn. With 8 badges,
Nushkie is waiting at the south of the city for her strongest battle yet, and now has a  Mega Salamence.Nushkie (Goldburn City)
- NidokingLv. 73 · Life Orb
- StarmieLv. 73 · Leftovers
- TalonflameLv. 63 · Heavy-Duty Boots
- DecidueyeLv. 64
 Rotom-WashLv. 75 · Chesto Berry
- Mega SalamenceLv. 78
-
Goldburn City Shores. Go south to the shore by the Rayquaza statue and the Dragon Tower.
Horus and his master  Osiris are there.
Osiris has all three legendary dogs and wants
 Ho-Oh, which can revive anything, to bring back his wife. Horus insists on battling you.Commander Horus (Goldburn City Shores)
 SawkLv. 75
 PoliwrathLv. 76 · Leftovers
 LuxrayLv. 76 · Flame Orb
 CorviknightLv. 77 · Leftovers
 LucarioLv. 77 · Life Orb
- Mega Charizard XLv. 80
-
Amberwick Town. Teleport to Amberwick, where
Osiris and Horus wait with Suicune, Raikou and Entei. Battle Ho-Oh (level 100): Osiris thanks you for weakening it and captures it.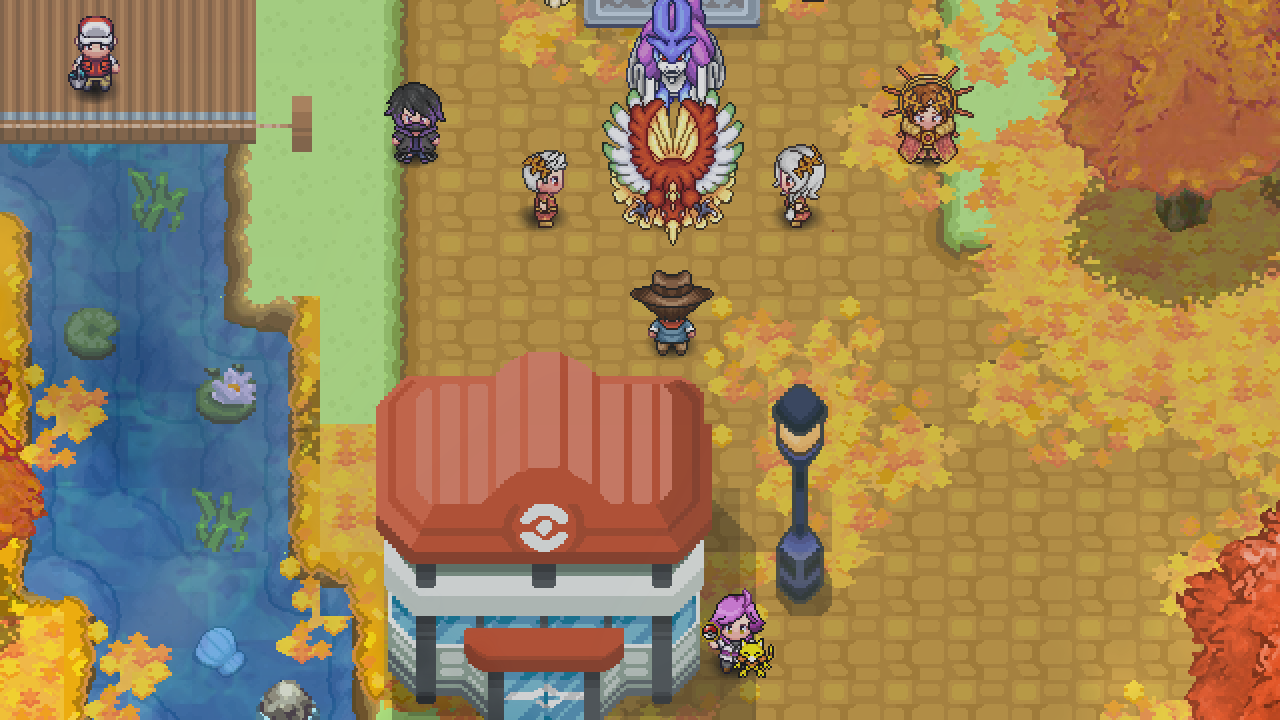
Osiris and Horus wait in Amberwick Town with Ho-Oh.  Ho-Oh (Amberwick Town)
- Ho-OhLv. 100
-
The amulet. Horus asks about the amulet you dropped on Mt. Inferno. He has the same one, given to him by his mother before he was kidnapped.
He takes off his mask: Horus is your brother. He asks you to stay out of their way and leaves.
-
Comfort Nushkie.
Nushkie is hiding in the Amberwick Pokémon Center. Comfort her. This opens the road to the Elite Four.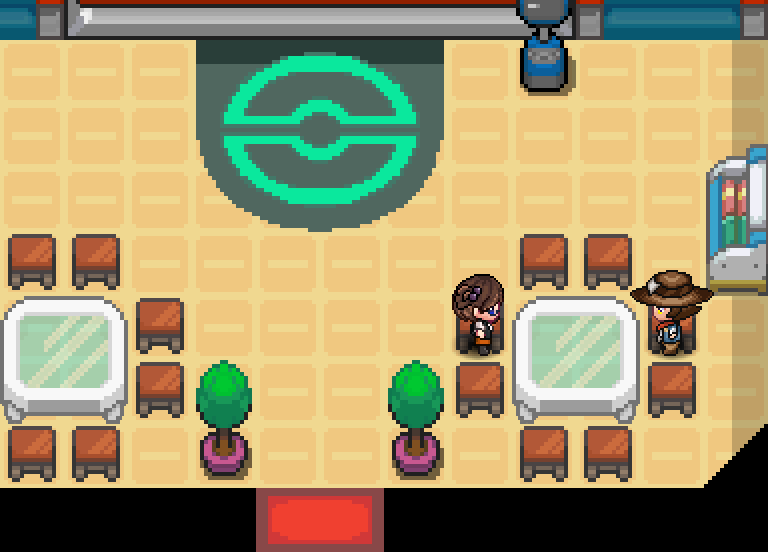
Amberwick PokeCenterNushkie is hiding here.

Next: the guard at Barfi Town’s east exit now lets you through to Champions Road.
Champions Road and the Elite Four
Section titled “Champions Road and the Elite Four”


Where to go: Barfi Town’s east exit, Route 13-A, Route 13-D, Champions Villa #1, Champions Road and Champions Villa #2.
-
Route 13. In Barfi Town, the
 guard at the east exit now lets you through. Go east through Route 13-A and then north through 13-D to Champions Villa #1, which has a Pokémon Center and a teleporter. Heal and stock up there.
-
Champions Road. This long cave has seven sections full of trainers.
- In Champions Road #1, take the north-west ladder; the other two lead to dead ends in #2.
- After that, every section has a single way forward. You come out in Champions Villa #2.
- Aroma Ladies in every section except #3 heal your team for free, and a loss then brings you back to the last one who healed you. Champions Road #2 also has an Item Seller with the Jvaloh Poké Mart stock.
-
Nushkie at the Elite Four Pokémon Center. Your last rival battle. The center’s nurse, shop and teleporter only appear once you are Champion.
Nushkie (Jvaloh Elite 4 Pokémon Center)- NidokingLv. 80 · Life Orb
- StarmieLv. 80 · Leftovers
- DecidueyeLv. 82
- TalonflameLv. 82 · Heavy-Duty Boots
- Rotom-WashLv. 83 · Chesto Berry
- Mega SalamenceLv. 85
-
The Jvaloh Elite Four. Altis, Zaptu, Ichii and then Sheta; see the Elite Four below. Jvaloh has no separate Champion: beating Sheta makes you Jvaloh’s new Champion.
The Jvaloh Elite Four
Section titled “The Jvaloh Elite Four”


The rules for Elite Four runs, healing and items are on Gyms, Elite Four and Champions.
Level: the Elite Four’s Pokémon are levels 80–87. Your Sinnoh Pokémon still fight at level 45 at most until you beat Sheta.
 Elite Four #1: Altis
 WeezingLv. 80 · Black Sludge
- NinetalesLv. 80 · Heat Rock
 Porygon-ZLv. 80 · Permanent Focus Sash
 ChandelureLv. 80 · Permanent Focus Sash
- BlazikenLv. 81 · Blazikenite
 SolgaleoLv. 80 · Leftovers
 Elite Four #2: Zaptu
 ElectivireLv. 82 · Expert Belt
 EelektrossLv. 82 · Leftovers
 GliscorLv. 82 · Toxic Orb
 LanturnLv. 82 · Leftovers
 AmpharosLv. 83 · Ampharosite
 XerneasLv. 82 · Life Orb
 Elite Four #3: Ichii
- NidokingLv. 84 · Life Orb
- MalamarLv. 84 · Leftovers
- CrawdauntLv. 84 · Life Orb
- DragalgeLv. 84 · Black Sludge
 BeedrillLv. 85 · Beedrillite
 DarkraiLv. 84 · Life Orb
 Elite Four #4: Sheta
 GardevoirLv. 86 · Leftovers
- HydreigonLv. 86 · Life Orb
- LucarioLv. 86 · Life Orb
- DragoniteLv. 86 · Permanent Focus Sash
 MawileLv. 87 · Mawilite
 YveltalLv. 86 · Leftovers
Worth catching:
| Where | Pokémon |
|---|---|
| Champions Road #4 |  Pawniard (Ultra Rare),  Lairon |
| Champions Road #7 | Rotom (Wash form) (Ultra Rare),  Mienfoo |
| Champions Road #6 |  Foongus |
Next: back in the Elite Four Pokémon Center, Horus has a tip for you.
The Dragon Tower
Section titled “The Dragon Tower”

Where to go: Goldburn City, then south past the Rayquaza statue into the Dragon Tower, from Floor 1 up to Floor 7.
-
Horus’s tip. Back in the Elite Four Pokémon Center,
 Horus congratulates you and tells you Osiris is in the Dragon Tower trying to resurrect his wife, while insisting that he is not helping you.
-
Climb the tower. Teleport to Goldburn City and go south past the Rayquaza statue. The
guard now lets you into the Dragon Tower.Battle your way up through the grunts on floors 1–6 (Floor 2 belongs to the Sutta gang). As Champion, your Sinnoh Pokémon now fight at their real level.
-
Battle Osiris. On Floor 7,
Osiris has brought his wife  Isis back, but her Rayquaza is out of control. Horus turns against Osiris and frees the legendary dogs while you battle Osiris.Osiris (Dragon Tower Floor 7)
- Ninetales-AlolaLv. 100
- Kommo-oLv. 100 · Permanent Throat Spray
- AbsolLv. 100 · Razor Claw
- HelioliskLv. 100 · Choice Specs
 AltariaLv. 100 · Life Orb
 Mega AlakazamLv. 100
-
Rayquaza. The reincarnated
 Rayquaza (level 120) is too much even for Ho-Oh. Defeat it before it destroys the tower.
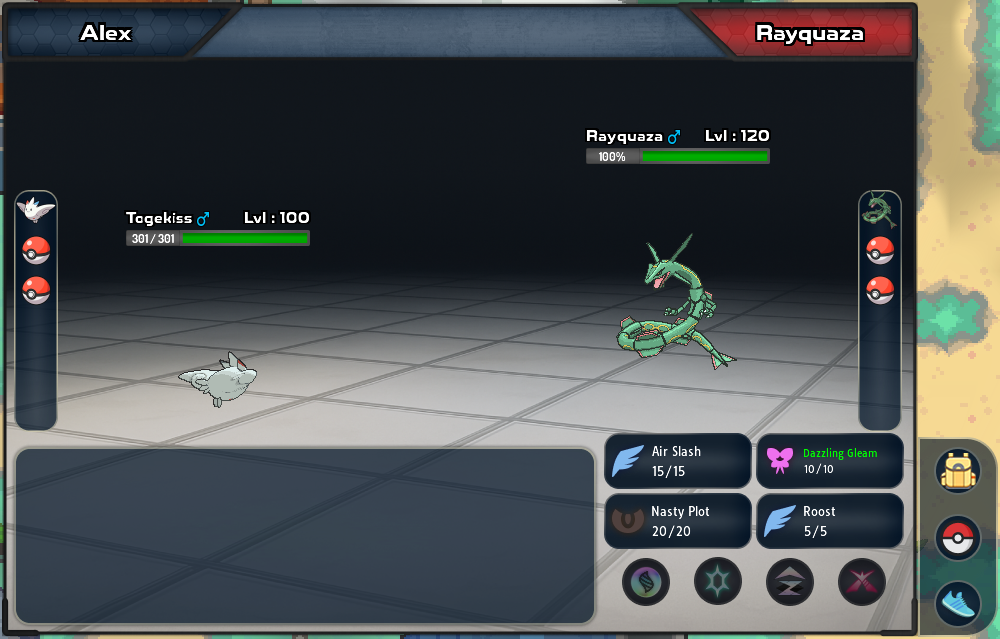
The final battle of the Jvaloh story: a level 120 Rayquaza.  Rayquaza (Dragon Tower Floor 7)
- RayquazaLv. 120
-
Outside the tower. Leave the Dragon Tower and talk to
 Horus on Goldburn City Shores. This is the end of the Jvaloh story, and it starts two new quests: Professor Blaze’s legendary dogs, and your move to Hoenn.
A Dragonite daily boss now waits on Floor 7, and  Dreepy (Ultra Rare) lives on Dragon Tower Floor 7.
Next: the post-game, starting with Horus’s news about your mother (see below).
After the story
Section titled “After the story”- Hoenn. Horus visited your mother. Go home to Twinleaf Town for the quest Reunion with Mom; it leads to Hoenn. See the Hoenn walkthrough.
- Legendary dogs. Professor Blaze calls you to his lab: three ancient monks can summon Suicune, Raikou and Entei. Beat a monk’s level 110–120 team and that dog appears in Jvaloh for you. See Jvaloh’s legendary dog priests.
- Nuzbar Village. Collect two Odd Keystones (one from Ruin Maniac Angus, one from a priest in Sinnoh) and give them to
 Tribe Member Nang in Nuzbar Forest, off Route 5-B. See Nuzbar Village and the Odd Keystones.
- Pamtre Berry, Vespiquen and Old Man Rajeev.
- In Nuzbar Village, Tribe Member Jingoh trades a
 Pamtre Berry for 30
 Big Mushrooms.
- Give it to the angry
 Vespiquen blocking Oozy Forest Northern Pass to reach Oozy Forest (Faunas), where
 Marrow Smuggler Dogu sells a Marrow Potion for 20 Big Mushrooms.
- Take the potion to Old Man Rajeev at Ochra Cliffs.
- Once you have also finished the Dragon Tower, the boy who stole from Rajeev,
 Guitar Boy Sitara, waits on Goldburn City Shores and gives you his shiny
 Delibird (you need a free party slot).
- Details: The angry Vespiquen and Old Man Rajeev.
- In Nuzbar Village,
- Gym reruns. Every Jvaloh gym leader now offers a double battle rematch at level 110 every 3 days, alone or with a partner. See Jvaloh gym reruns.
- Daily bosses. Ursaring, Eelektross, Mandibuzz, Ninetales,
 Pinsir,
 Scolipede, Vespiquen, Alolan Ninetales, Dragonite and either Seviper or Zangoose (your Forest Flute choice) fight once a day and can drop costume pieces and TMs. See Jvaloh daily bosses.
- Ace Trainer brothers.
 Ichi, Niji, San and Yon on Milen Bridge give daily double battles that scale with you. See Ace Trainer brothers.


Every Jvaloh gym at a glance
Section titled “Every Jvaloh gym at a glance”| Badge | Leader | Type | Town | Prize money (F) | TM or TR |
|---|---|---|---|---|---|
| 1 | Ghadafi | Rock | Patthar Village | 300 | TM48 Rock Tomb |
| 2 | Elleak | Electric | Bijli City | 500 | TR80 Electro Ball |
| 3 | Izumi | Water | Lehar Town | 750 | TM33 Rain Dance |
| 4 | Aurelia | Normal | Grayroot Town | 1,500 | TR01 Body Slam |
| 5 | Arturo | Ground | Lansoil City | 2,500 | TM81 Bulldoze |
| 6 | Blitz | Fire | Mt. Inferno Peak (Amberwick) | 4,000 | TM34 Sunny Day |
| 7 | General Thanda | Ice | Barfi Town | 6,500 | TM35 Hail |
| 8 | Charil | Dragon | Goldburn City | 8,000 | TR47 Dragon Claw |
Every leader also gives you a few Blaze Coins. The TMs and TRs are old ones: upgrade them before use (see the note under Gym 1).