
Things to know
PBO plays like the Pokémon games you know, but a few of its rules are its own. Knowing them early saves you time and money. Words such as F, IV or Ultra Rare are explained in words used in these guides.
Words used in these guides
Section titled “Words used in these guides”| Word | What it means |
|---|---|
| F | PBO’s money. Prices are written like 2,000 F. |
| Rarity | How often a wild Pokémon appears, from most to least often: Common, Uncommon, Rare, Very Rare, Ultra Rare and Legendary. The Pokémon locations tables show it for every wild Pokémon. |
| IV | Individual value: a Pokémon’s natural potential in one stat, from 0 to 31. It is set when you catch the Pokémon; items such as the  IV Potion change it. See stats, IVs, EVs and natures. |
| EV | Effort value: stat points a Pokémon earns by defeating other Pokémon, up to 252 in one stat and 510 in total. See EV training. |
| OT | Original Trainer: the player who caught the Pokémon. The Summary tab of its card shows their name. Quests that need a Pokémon you caught yourself check this. |
| TM and TR | A TM teaches a move and is used up when your Pokémon learns it. TRs and old-generation TMs can’t be taught any more until you upgrade them. |
| Blaze Coin | A coin you earn from Gym Leaders, VS Seeker battles and some bosses, and spend at Blaze Coin Shops. It can’t be traded. See Blaze Coins. |
| Gems | Donator Gems, the Donator Store currency. You get them by supporting the game, from Gem Boxes, and from some Game Pass levels and ranked PvP rewards. See shops and currencies. |
Day and night follow server time
Section titled “Day and night follow server time”PBO’s clock runs on UTC and goes through day and night twice every 24 hours. The clock next to the map name shows server time; hover over it (or tap it) to see this table in game.
| Server time (UTC) | Time of day |
|---|---|
| 06:00 – 11:59 | Day |
| 12:00 – 17:59 | Night |
| 18:00 – 23:59 | Day |
| 00:00 – 05:59 | Night |
Some wild Pokémon only appear by day or by night (the Pokémon locations tables mark them), and some evolve differently depending on the time. See evolution methods.
Pokémon are tied to their region
Section titled “Pokémon are tied to their region”Every Pokémon remembers the region it was caught in. Outside that region, its home region decides whether it gains experience and, in wild and NPC battles, the level it fights at.
On this page, being a region’s Champion means you have beaten that region’s Elite Four, final battle included. In Jvaloh the final battle is the fourth Elite Four member.
The regions count as earlier or later in story order: Sinnoh → Jvaloh → Hoenn → Kanto.
Experience
Section titled “Experience”| Pokémon caught in… | Gains experience? |
|---|---|
| The region you are in | Always. |
| An earlier region (for example a Sinnoh Pokémon in Hoenn) | Yes, as normal. In Kanto, only once you are Champion of the region it came from. |
| A later region (for example a Hoenn Pokémon in Sinnoh) | No, until you are Champion of its home region. |
Becoming Champion of the region you are in does not change these rules; only your progress in the Pokémon’s home region counts.
Levels in wild and NPC battles
Section titled “Levels in wild and NPC battles”| Where you are | Level your Pokémon battle at |
|---|---|
| Sinnoh | No change. Every Pokémon battles at its real level. |
| Jvaloh and Hoenn | Pokémon from an earlier region battle at no more than the battle cap for the badges you hold in the region you are in (Jvaloh or Hoenn); see level caps by badge count. Pokémon from this region or a later one keep their level. |
| Kanto | Pokémon caught in any other region battle at level 1, so you mostly use Pokémon caught in Kanto until you are Kanto Champion. |
Once you are Champion of the region you are in, your Pokémon battle at their real level there. PvP battles are never scaled.
Changing a Pokémon’s region
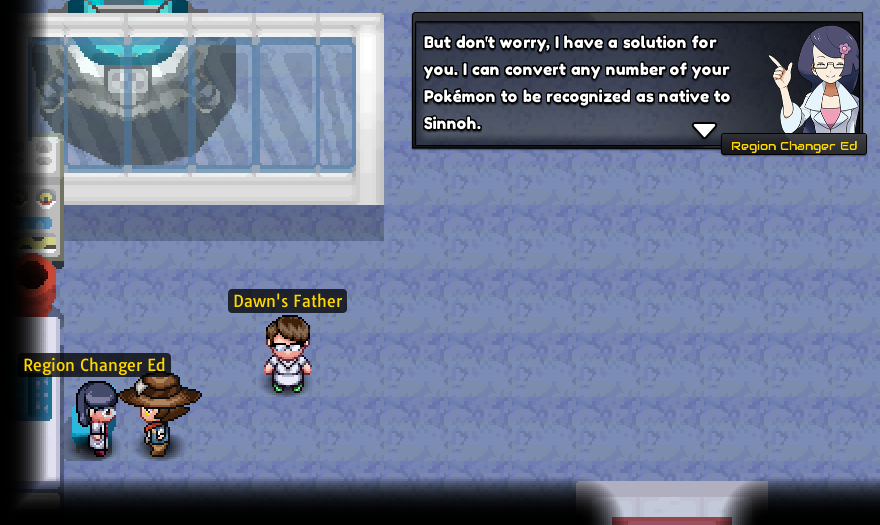
Section titled “Changing a Pokémon’s region”Three labs have a Region Changer. For free, they re-register a party Pokémon caught in any other region as native to their own region.
The Pokémon’s level must be at or below the Region Changer cap for the badges you hold in that Region Changer’s region (see level caps by badge count). The NPC tells you your current limit.
| Where | Who | Makes Pokémon native to | How many |
|---|---|---|---|
| Prof. Rowan’s Lab, Sandgem Town | Region Changer Ed | Sinnoh | As many as you like |
| Prof. Blaze’s Lab (reception), Jvaloh | Region Changer Chavez | Jvaloh | 7 per account |
| Professor Birch’s Laboratory, Hoenn | Region Changer Reda | Hoenn | 5 per account |
There is no Region Changer for Kanto.


Level caps by badge count
Section titled “Level caps by badge count”Three rules cap a Pokémon’s level by how many badges you have. Each one counts the badges of a different region:
- Battle cap: in Jvaloh and Hoenn, Pokémon from an earlier region fight at no more than this level. It counts your badges in the region you are in.
- Trade cap: the highest level you can trade a Pokémon at. It counts your badges in the region that Pokémon was caught in.
- Region Changer cap: the highest level a Region Changer accepts. It counts your badges in the Region Changer’s own region.
| Badges | Battle cap | Trade cap | Region Changer cap |
|---|---|---|---|
| 0 | 5 | 5 | 5 |
| 1 | 10 | 12 | 15 |
| 2 | 15 | 19 | 25 |
| 3 | 20 | 26 | 35 |
| 4 | 25 | 33 | 45 |
| 5 | 30 | 40 | 55 |
| 6 | 35 | 47 | 65 |
| 7 | 40 | 54 | 75 |
| 8 | 45 | 61 | 85 |
Once you are Champion of a region, the battle cap no longer applies there, and you can trade that region’s Pokémon at any level. In Kanto the battle cap is different: Pokémon from other regions fight at level 1 until you are Kanto Champion.
Trading has a level cap until you are Champion
Section titled “Trading has a level cap until you are Champion”When you trade with another player, each Pokémon’s level can be at most the trade cap in level caps by badge count, counted with your badges in the region that Pokémon was caught in. Once you are Champion of that region, you can trade its Pokémon at any level. Both players have to meet the cap.
The Trade House uses the same trade caps, but counts your badges in the region you are standing in, and lifts the cap once you are Champion of that region. A Pokémon you buy there becomes native to that region. See trading with players and the Trade House guide.
Don’t release Ultra Rare, Legendary or shiny Pokémon
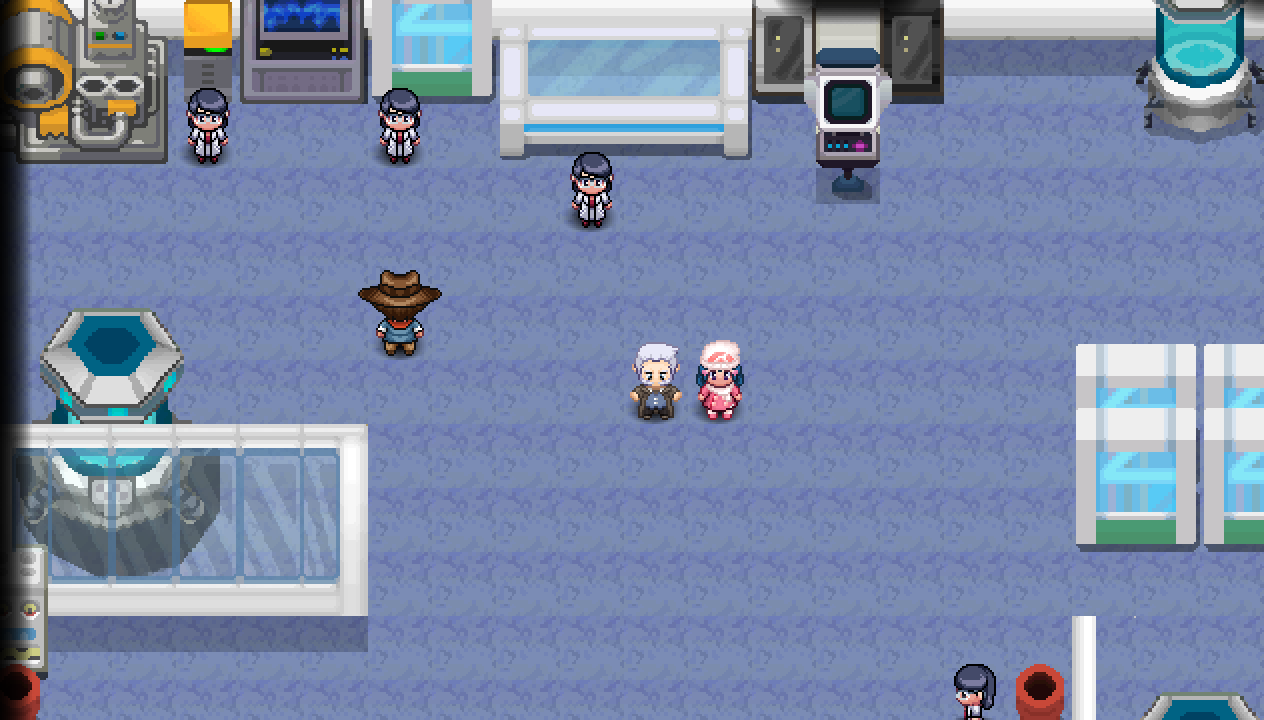
Section titled “Don’t release Ultra Rare, Legendary or shiny Pokémon”Even one with a bad nature is worth something. The IV Scientists in Prof. Rowan’s Lab in Sandgem Town turn them into IV Potions, which raise one IV of a Pokémon by 1:
| Scientist | Takes | Gives |
|---|---|---|
| IV Scientist #1 | an Ultra Rare Pokémon | IV Potionx1 |
| IV Scientist #2 | a shiny Pokémon | IV Potionx1 |
| IV Scientist #3 | a Legendary Pokémon | IV Potionx3 |
Keep that in mind before you sell one cheaply. See IV items for more on IVs.
Sell spare items to the Item Buyer
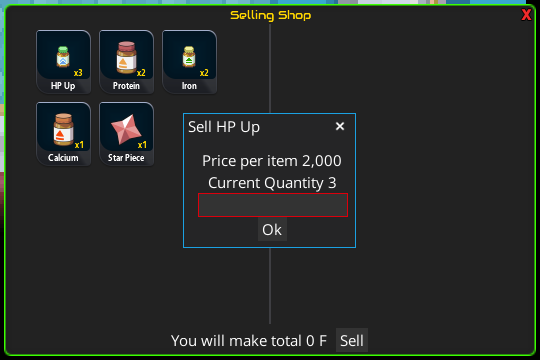
Section titled “Sell spare items to the Item Buyer”Many Poké Marts have a second clerk who buys items. Talk to them to sell items for cash:
- the Item Buyer in Sandgem’s Mart in Sinnoh
- the Mart Attendant in the Rockshore City PokeMart in Jvaloh
- a Buyer in most Marts in Hoenn and Kanto
Some prices are much better than you’d expect:
| Item | Price each (F) |
|---|---|
Vitamins:  HP Up  Protein  Iron  Calcium  Zinc  Carbos |
2,000 |
Evolution stones:  Fire Stone  Water Stone  Leaf Stone  Thunder Stone  Sun Stone  Moon Stone  Shiny Stone  Dusk Stone  Dawn Stone |
2,000 |
Trade-evolution items, for example  Metal Coat  King's Rock  Dragon Scale  Electirizer |
3,000 |
 Big Nugget |
5,000 |
 Star Piece |
6,000 |
 Balm Mushroom |
7,500 |
 Comet Shard |
12,500 |
The buyer shows the full list and current prices. See making money for more ways to earn.
Exp. Share also passes on EVs
Section titled “Exp. Share also passes on EVs”In wild battles, the first Pokémon in your party holding an Exp. Share earns the defeated Pokémon’s EVs too, as if it had battled. That makes EV training much quicker, because you don’t have to switch in the Pokémon you are training.
| Works | Doesn’t work |
|---|---|
 Exp. Share and its four crafted versions:  Soothe Share,  Everstone Exp Share,  Move-Block Exp Share and  Macho Brace Exp Share |
 Exp. Share (Untradable), the one you get from Barry on Route 203 or from Bug Catcher Paul in Eterna Forest. It only shares experience. |
See EV training for the details.
Running Shoes, bicycles and mounts are equally fast
Section titled “Running Shoes, bicycles and mounts are equally fast” Running Shoes, the
 Bicycle and every mount move you at the same speed, twice your walking speed. Mounts change how you look, not how fast you go, and surfing mounts move at that same speed on water. See mounts and costumes.
- Running Shoes: from your mom at the start of the game.
- Bicycle: from Ben at Red Rickshaw’s Cycle Shop in Eterna City, after you deal with Team Galactic in their Eterna building.
- To stop riding or running: use the quick menu on your trainer or type
/walk.

Each region needs its own map
Section titled “Each region needs its own map”The World Map only opens if you have the Map item of the region you are in. Each other region’s Map item in your bag adds that region as a tab on the map, so you can look at it from anywhere. See the World Map for how to use it.
| Map | Who gives it |
|---|---|
 Sinnoh Map |
Barry in Jubilife City’s Trainer School, when you deliver the Parcel |
 Jvaloh Map |
Aunt Mai in your house in Jvaloh |
 Hoenn Map |
Professor Birch in his laboratory |
| Kanto Map | Daisy in Gary’s House |


Key items open new places
Section titled “Key items open new places”Some items in your Bag work like keys: without them a route, a ship or a whole activity stays closed. The walkthroughs cover each one in story order, and this table collects them.
| Item | What it opens | Where you get it |
|---|---|---|
| Running Shoes |
Running | See Running Shoes, bicycles and mounts |
| Bicycle |
Eterna Pass and the Cycling Road (Sinnoh), Route 17 (Kanto), and Hoenn’s bike paths once Rydel in Mauville City upgrades it | See Running Shoes, bicycles and mounts |
HMs, such as  HM01 |
Trees, rocks, boulders, water and waterfalls in your way | Along the Sinnoh story; HM09 Dive in Hoenn. See where to get each HM |
 Old Rod |
Fishing | Fishing Expert, Jubilife City (your first rod). Better rods come later: see fishing rods |
 Galactic Key |
The locked doors of the Team Galactic HQ (Sinnoh) | A Poké Ball on Galactic B2F, Veilstone City (Team Galactic HQ) |
 Steel Cave Pass |
The Steel Cavern under Iron Island (Sinnoh) | Riley, once you find his Lucario (the Steel Cavern quest) |
 Hoenn Ship Pass |
The ship from Snowpoint City to Hoenn | Your mom in Twinleaf Town, late in the Jvaloh story (moving to Hoenn) |
 Go Goggles |
The Scorched Desert (Jvaloh) | Ruin Maniac Manas in Regis Town, for 5 Casteliacones (across the Scorched Desert) |
 Seafarer Pass |
The S.S. Seafarer from Lansoil Docks to Sunshire Town and Moonshire Docks (Jvaloh) | Sailor Sonny at Lansoil Docks, for 2 Lemonades (Amberwick Town and Mt. Inferno) |
 Devon Scope |
The aura on Route 5-B, the way to Nuzbar Forest (Jvaloh) | Gentleman Fargo in Glassmoor City, for his Medal Box (Nuzbar Village) |
 Go Goggles (Hoenn) |
The Route 111 desert (Hoenn) | May, outside Lavaridge Gym (Lavaridge Town) |
 Mining Toolpad |
The Mining Radar, where you equip your pickaxe | The Mining Foreman’s Miner’s Genesis Kit, Lavaridge Town (unlock mining) |
 S.S. Ticket |
The S.S. Anne at Vermilion Port (Kanto) | Bill, in the Sea Cottage on Route 25 (Bill and the S.S. Anne) |
 Lift Key |
The lift in the Rocket Hideout (Kanto) | Rocket Grunt Tim, Rocket Hideout B4F (Rocket Hideout) |
 Silph Scope |
The Pokémon Tower above 6F (Kanto) | Giovanni, Rocket Hideout B4F (Rocket Hideout) |
 Poké Flute |
Routes 12 and 16, where Snorlax sleep (Kanto) | Mr. Fuji, Pokémon Tower 7F (Rocket Hideout) |
 Secret Key |
The Cinnabar Island Gym (Kanto) | Pokémon Mansion B1F (the Pokémon Mansion) |
| Region maps | The World Map | See each region needs its own map |
Competition Balls release what they catch
Section titled “Competition Balls release what they catch” Competition Balls are for the Bug-Catching and Fishing competitions. A Pokémon caught with one is released straight away and never reaches your PC, so don’t use them on anything you want to keep. See hunting competitions.
Shiny Tracker Safe balls only work at events
Section titled “Shiny Tracker Safe balls only work at events”Poké Balls marked (Shiny Tracker Safe), such as the  Poke Ball (Shiny Tracker Safe), only work during events, on the event maps. Anywhere else they don’t catch anything.
Inside an event they let you catch other Pokémon without breaking your Shiny Tracker. See shiny hunting.
A Blaze Radar protects rare encounters
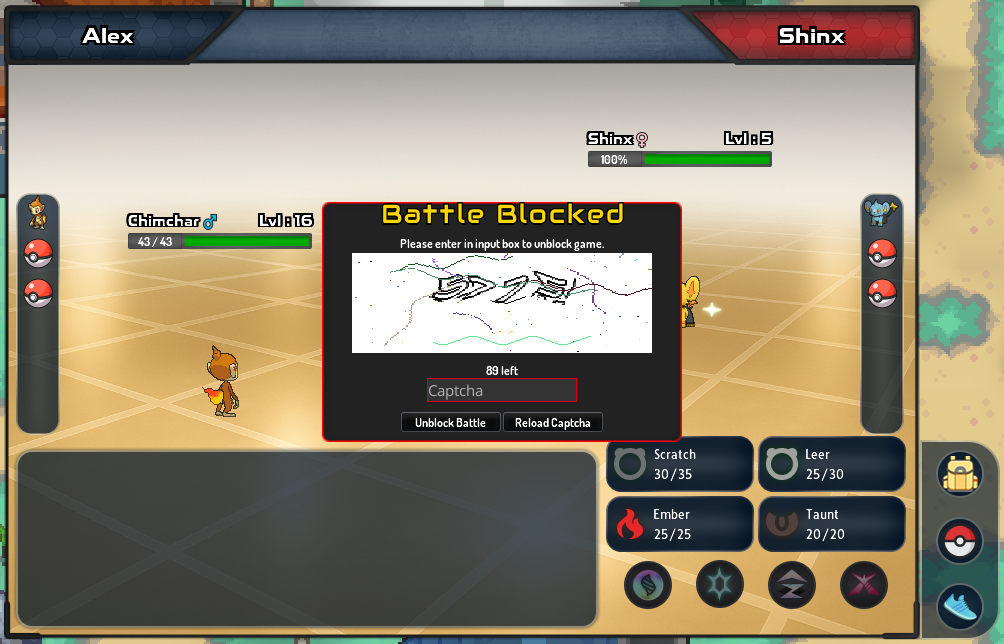
Section titled “A Blaze Radar protects rare encounters”A Blaze Radar watches for rare Pokémon. When one appears, the battle is blocked until you type the code shown on screen, so you can’t run from it or knock it out by reflex.
| Radar | Reacts to | Lasts |
|---|---|---|
 Blaze Radar |
Shiny, Ultra Rare and Legendary Pokémon | 3,000 encounters, or until it triggers |
After you unblock the battle, your attacks hit normally, so be careful.
Old TMs need upgrading
Section titled “Old TMs need upgrading”Old-generation TMs and TRs can’t be taught any more. Assistant Tim in Prof. Rowan’s Lab (and Assistant Kurt in Professor Birch’s Laboratory) upgrades them to the current version.
The upgrade can’t be undone. See TMs and move tutors.
Some costumes are for boys or girls only
Section titled “Some costumes are for boys or girls only”Many outfits come in separate boy and girl versions. A piece made for the other sprite can’t be worn, so check before you buy or trade costume items. Style Preview in the Help window lets you try things on first. See changing your outfit.
A few costumes, such as Team Plasma, Team Magma and Team Rocket, have a male and a female version that every trainer can wear. See boy and girl costumes.
Hidden items lie on outdoor maps
Section titled “Hidden items lie on outdoor maps”Every few hours the server hides items, and the chat announces when it does:
 Bronze Blaze Chest,
 Silver Blaze Chest,
 Gold Blaze Chest and
 Dragon Balls on random outdoor maps
 Abyssal Pearls on underwater maps
Players can hide items too, by opening an  Item Bomb. Hidden items can’t be seen: you find one by walking onto its tile.
Indoor maps and caves don’t get them, and items nobody finds are cleared away after a while. Hover over a Blaze Chest in your Bag (on a phone, touch and hold it) to see every prize it can give. Dragon Balls are spent at the Dragon Ball Shop in a cave in Solaceon Town; see shops and currencies.

Repels add up
Section titled “Repels add up”Using a repel while one is active adds its steps to the ones you have left. Press the  Repel icon in the player panel to see how many steps remain.
Hotkeys save a lot of time
Section titled “Hotkeys save a lot of time”On a computer, almost everything has a key: 1–4 pick moves in battle, R runs from wild battles, F fishes, Space talks to NPCs, and the main windows each have a letter. You can change them all in Settings → Controls. The full list is in settings and performance.